In the Homelab community there are multiple self-hosted solutions for a landing page/service overview including but not limited to Homarr, Organizr, Heimdall, Dashy, etc I'm going to cover using Homepage as I've been using it for a couple months now and in doing so, demonstrate how to utilize Portainer stacks to pull from a GitHub private repository and the benefits of doing that.
This article expounds on concepts demonstrated in my earlier article Portainer for your Homelab. In case you're wondering what I'm doing with the Tailscale containers, reference that.
As always, all files referenced can be found in full here.
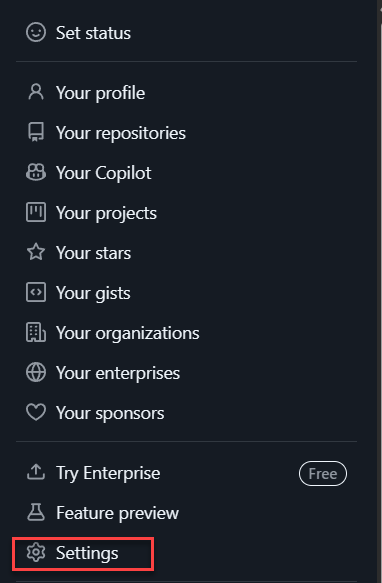
You'll need to have a GitHub account with a private repository. Once logged into your account, go to the top right where your profile is and click on Settings.
Scroll down to the bottom and click Developer options then Personal access tokens and Fine grained tokens. We're going to click on Generate new token.
Fill out a Token name and set the Expiration to what you wish. Select the specific private repository under Only select repositories. Finally select Repository permissions and for the purpose of this we only need Contents with Read-Only.
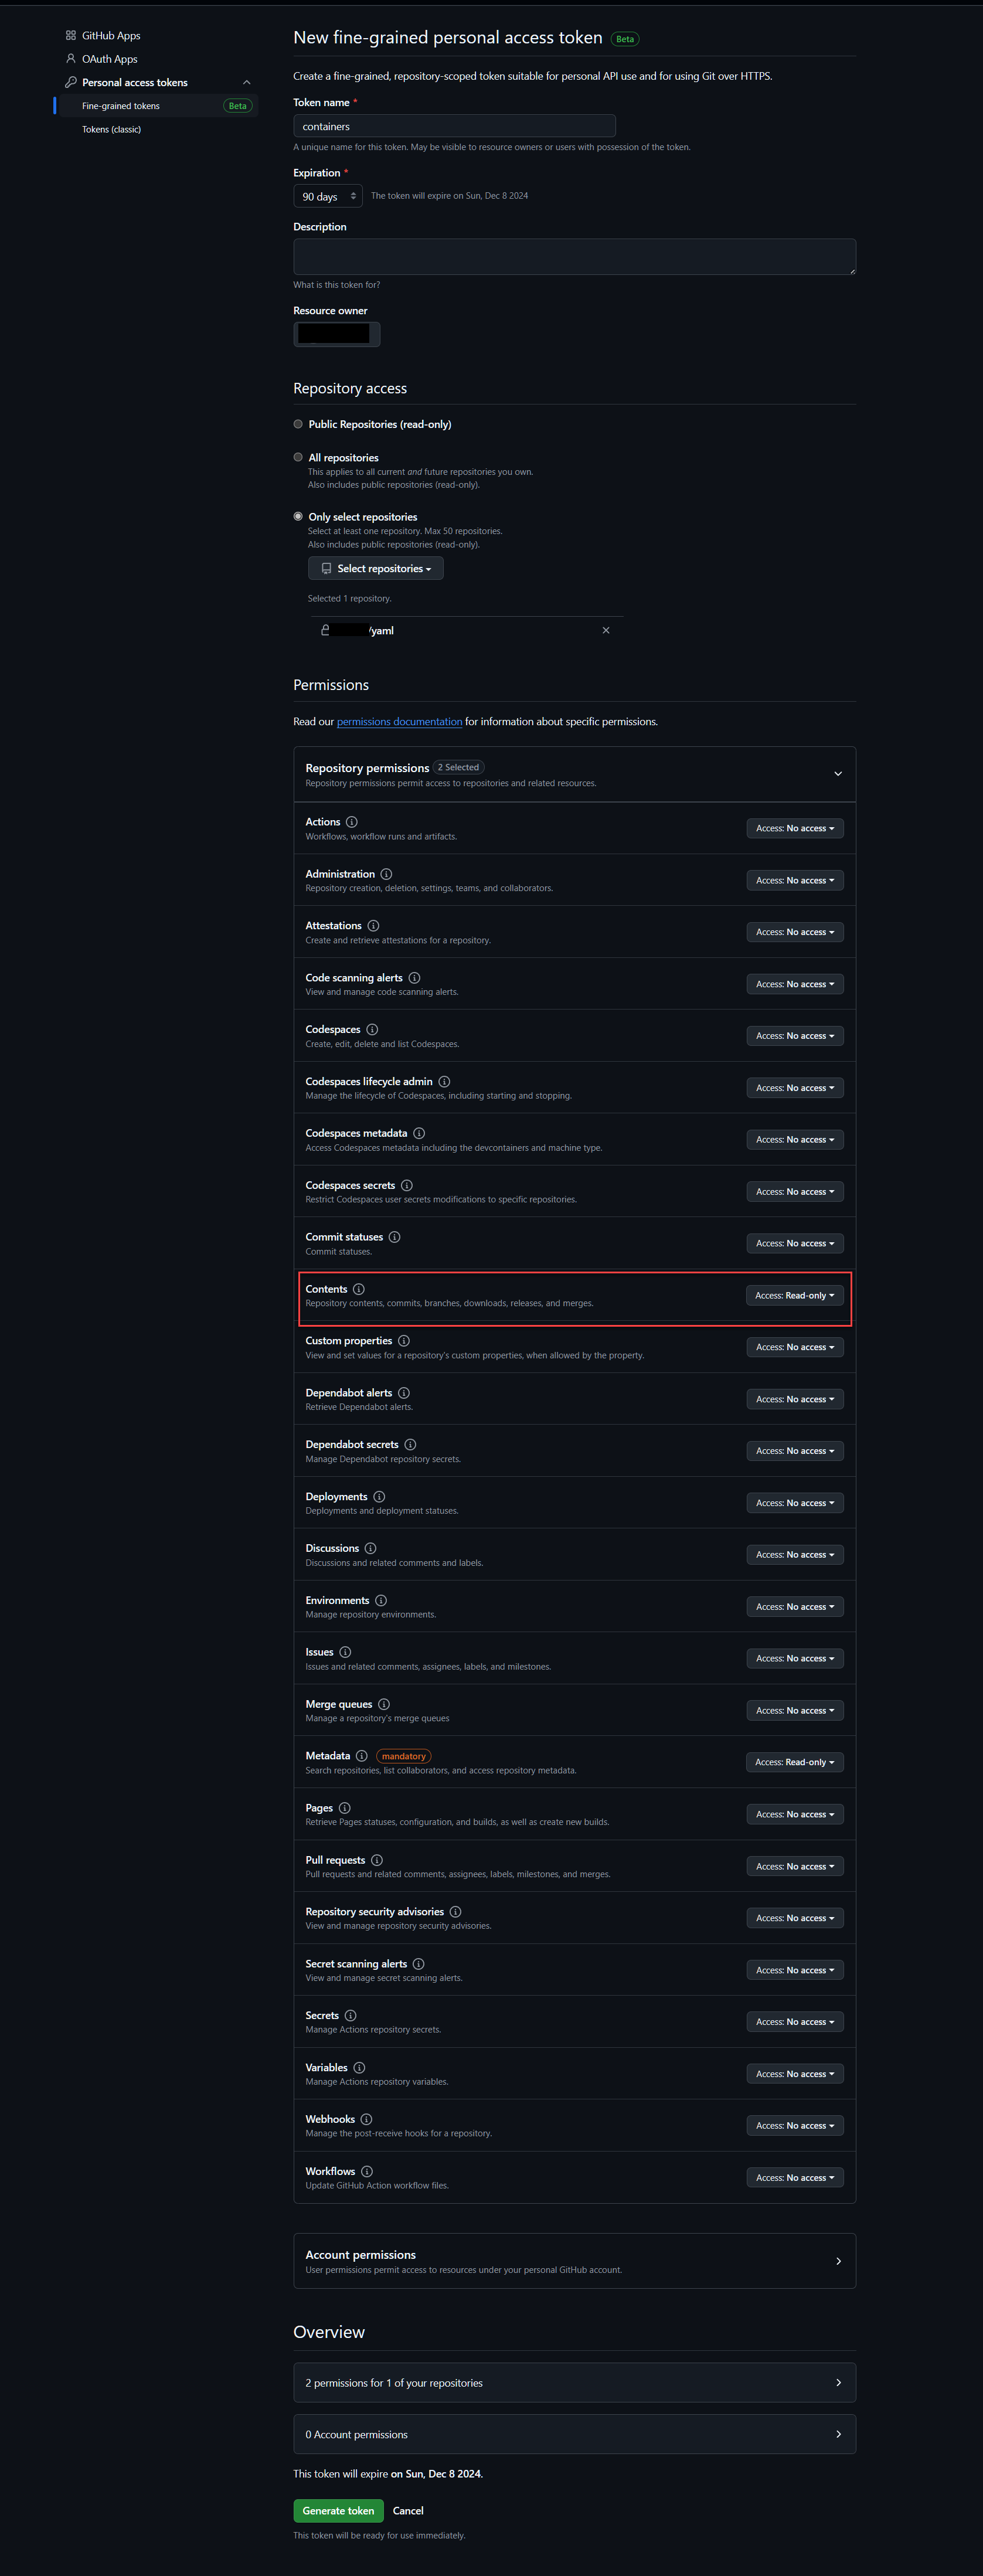
Keep the token that will be generated secret, keep it safe.
In the private repository, create a folder named Homepage, and a file compose.yml.
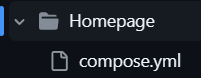
Edit the compose.yml to have the following:
services:
  ts-homepage:
    image: tailscale/tailscale:latest
    container_name: ts-homepage
    hostname: homepage
    environment:
      - TS_AUTHKEY=${TSKEY_AUTH}
      - TS_EXTRA_ARGS=--advertise-tags=tag:container
      - TS_HOSTNAME=home
      - TS_STATE_DIR=/var/lib/tailscale
      - TS_USERSPACE=false
      - TS_SERVE_CONFIG=/config/homepage.json
    volumes:
      - ${APPDATA}/ts-homepage/state:/var/lib/tailscale
      - ${APPDATA}/ts-homepage/config:/config
      - /dev/net/tun:/dev/net/tun
    cap_add:
      - net_admin
      - sys_module
    restart: unless-stopped
  homepage:
    image: ghcr.io/gethomepage/homepage:latest
    container_name: homepage
    volumes:
      - ${APPDATA}/homepage/config:/app/config
      - /var/run/docker.sock:/var/run/docker.sock
    restart: unless-stopped
    depends_on:
      - ts-homepage
    network_mode: service:ts-homepage
volumes:
  ts-homepage:
    driver: local
For the Tailscale bit, we'll have to make the directory and put the homepage.json there first once again. So on the Ubuntu host run mkdir -p ~/appdata/ts-homepage/config and nano ~/appdata/ts-homepage/config/homepage.json and put the following:
{
  "TCP": {
    "443": {
      "HTTPS": true
    }
  },
  "Web": {
    "${TS_CERT_DOMAIN}:443": {
      "Handlers": {
        "/": {
          "Proxy": "http://127.0.0.1:3000"
        }
      }
    }
  }
}
You'll notice the above is a different json than the one needed for Portainer, each container needs to be tweaked depending on how it's setup and what port it listens on. I recommend familiarizing yourself with entering the container and running tailscale serve commands with the various flags and then tailscale serve status --json when you've found a successful one.
On the host that runs the Portainer, let's modify some things so we're not adding the same variable to each stack we create. Modify the .env file and make it look something like this.
TSKEY_AUTH=tskey-auth-blahblahblah-blahblahblah
APPDATA=/home/<yourusername>/appdata
HOMEPAGE_VAR_PORTAINER_API_KEY=<PortainerAPIKey>
HOMEPAGE_VAR_PI_API_KEY=<PiAPIKey>
Don't worry yet about having values for the HOMEPAGE_VAR yet, those will be filled in later.
In your compose.yml add the following somewhere in your Portainer service
env_file: ./.env
For instance mine is placed here
  portainer:
    image: portainer/portainer-ee:latest
    container_name: portainer
    restart: always
    volumes:
      - /var/run/docker.sock:/var/run/docker.sock
      - ${APPDATA}/portainer:/data
    env_file: ./.env
This is telling Portainer to use that .env file for itself as well as passing it on to any child containers.
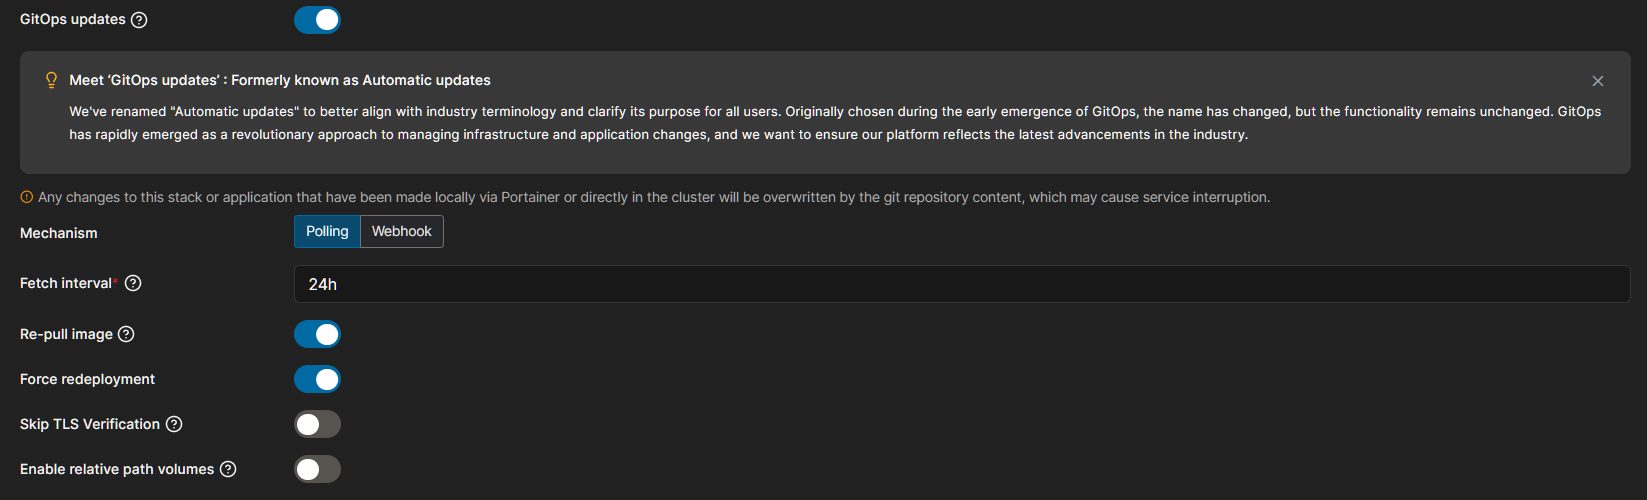
We visit the https://portainer.<magicdns>.ts.net we set up prior, log in, and go to stacks -> add stack. Select Repository, then toggle the Git repository Authentication, and enter username and your personal access token that you generated earlier. Input the url for your repository in Repository URL, leave the reference alone, and if you start typing Homepage, the Compose path should recognize and fill out the rest.
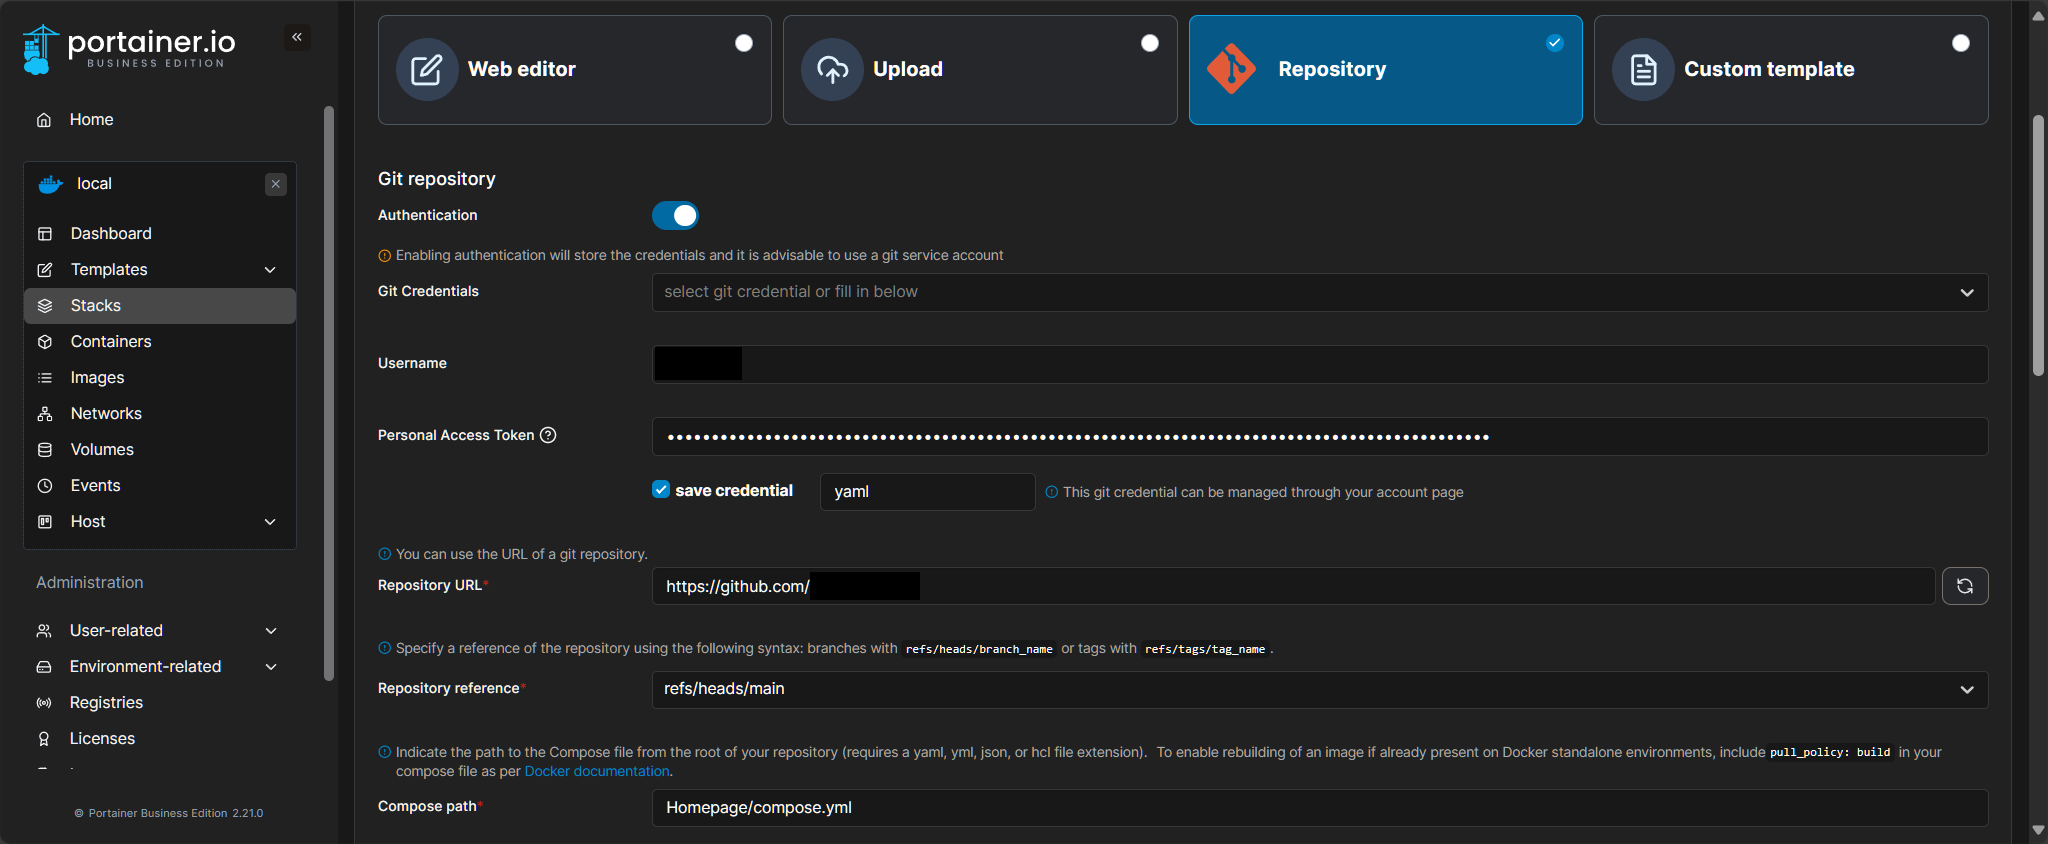
Toggle the next options as below, I put the fetch interval to once a day. With the Re-pull image and Force redeployment we eliminate the need to have a Watchtower container to keep our images on the latest and greatest.
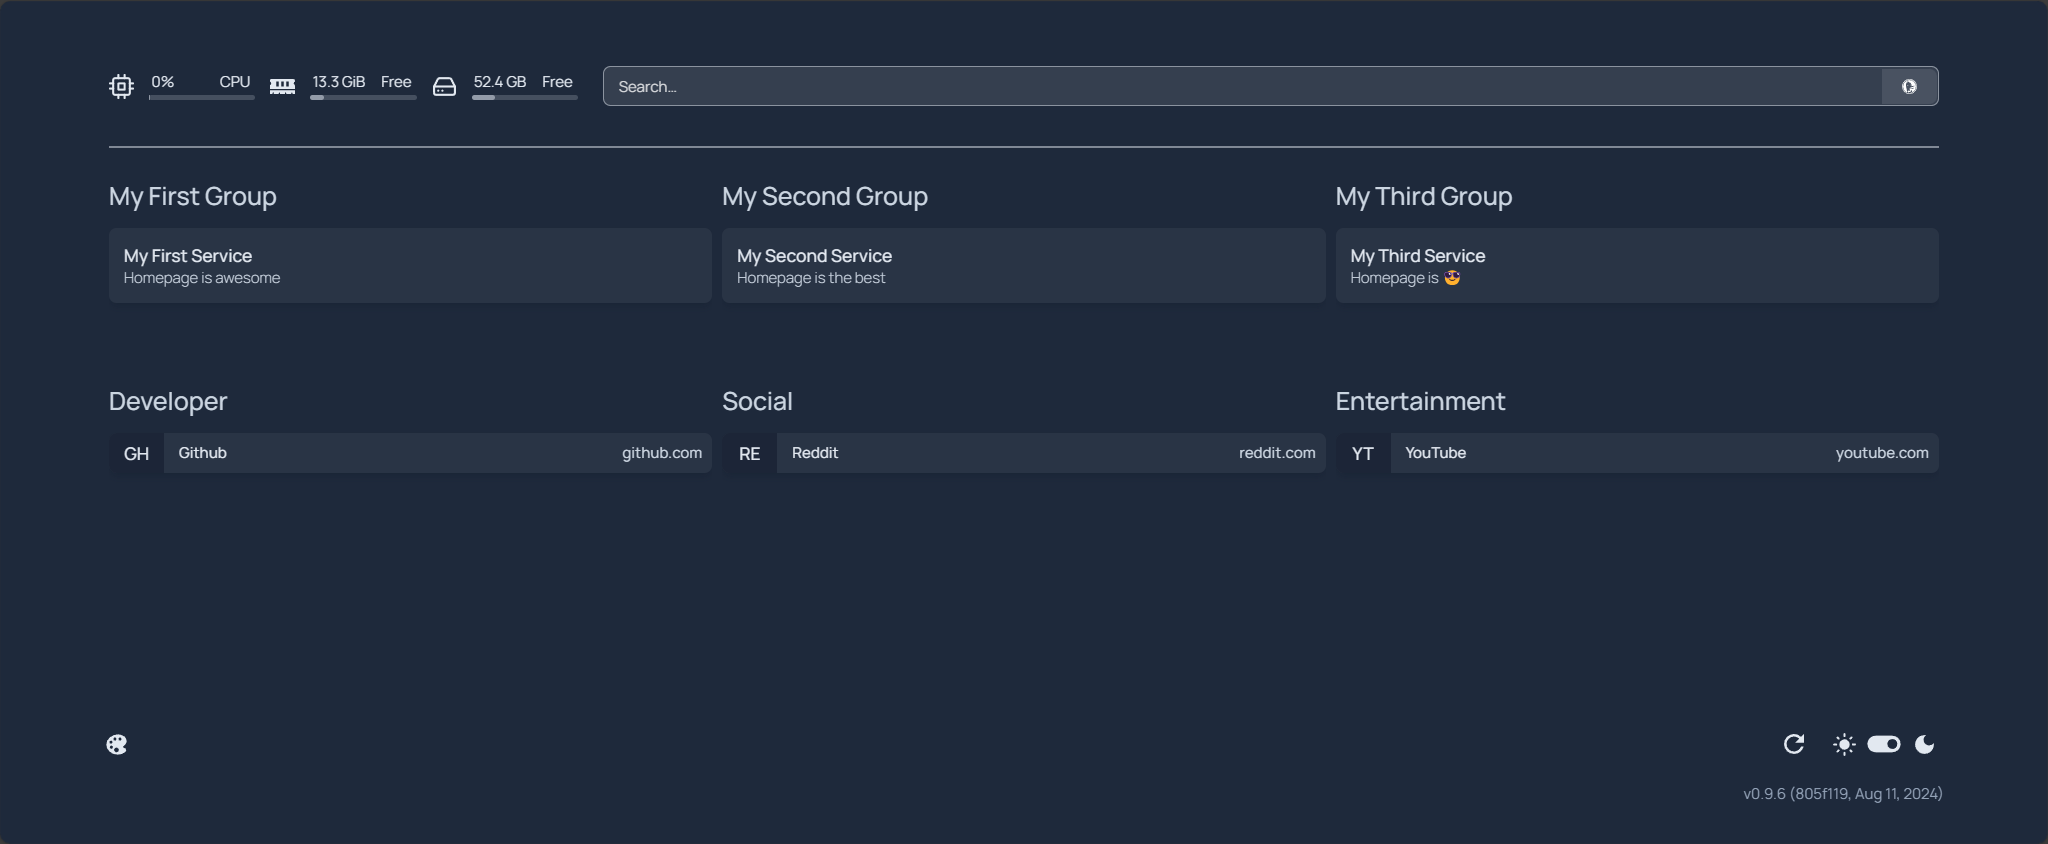
Deploy the stack and once successfully deployed, visiting https://home.<magicdns>.ts.net now shows us the default homepage configuration. Now let's look into modifying it.
From the docker host, we do a quick ls of the container and see it's dropped a couple new files. These are the files we'll be editing to customize our homepage.

There are all sorts of configuration changes to be done as this is highly customizable. I encourage you to visit their documentation on customization, or widgets, or docker discovery.....you get the picture.
The first one I'm going to modify is the services.yaml.
---
# For configuration options and examples, please see:
# https://gethomepage.dev/latest/configs/services
# icon url https://github.com/walkxcode/dashboard-icons/blob/main/ICONS.md
- Services:
- PiHole:
icon: pi-hole.png
href: https://pihole.<magicdns>.ts.net
ping: 192.1.1.1
weight: 2
widget:
type: pihole
url: http://100.1.1.1
key: {{HOMEPAGE_VAR_PI_API_KEY}}
- WAN:
icon: webtools.png
widget:
type: customapi
url: https://ipinfo.io/json
refreshInterval: 100000 # optional - in milliseconds, defaults to 10s
method: GET
mappings:
- field: 'org'
format: text
remap:
- value: /^AS\d+\s/
to: ''
- field: 'ip'
format: text
- Homelab:
- Proxmox:
icon: proxmox.png
href: https://pve.<magicdns>.ts.net
- NAS:
icon: synology.png
href: https://nas.<magicdns>.ts.net/
ping: 192.1.1.1
- iDRAC:
icon: idrac.png
href: https://192.1.1.1/ui/#/login
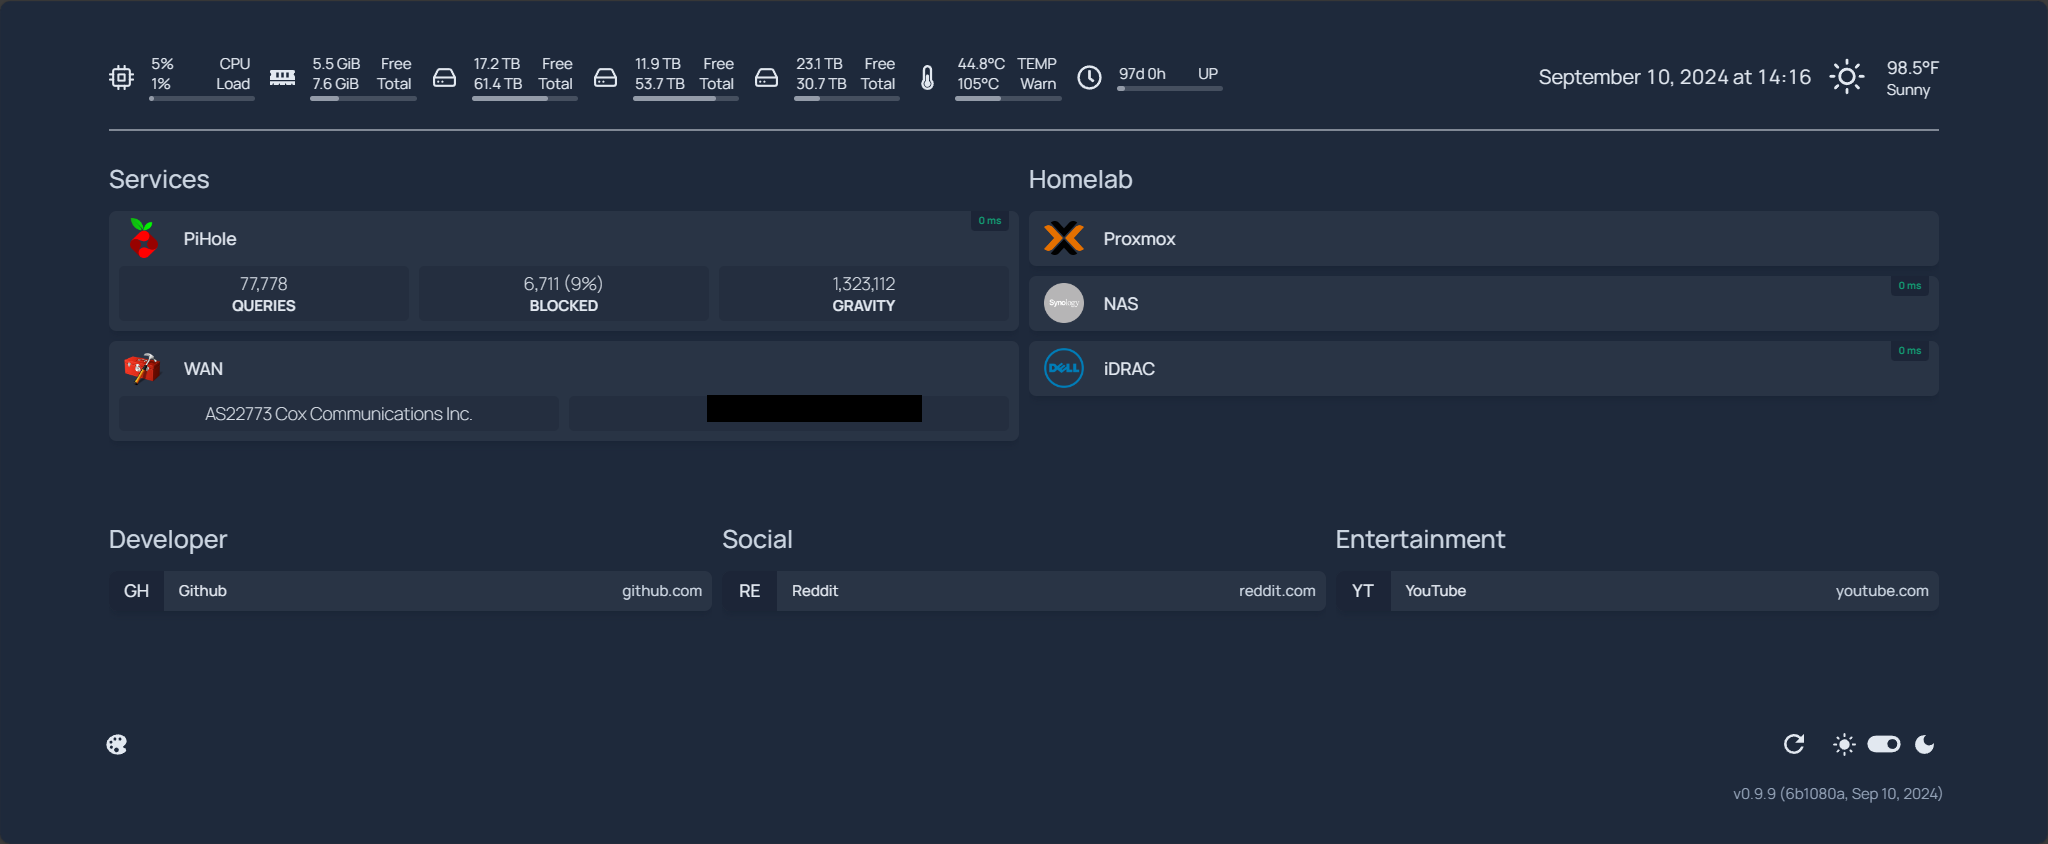
ping: 192.1.1.1This makes two service widgets under Services one that pulls from my pihole and one that uses their customapi to query which ISP I'm using and my public IP. I have a dual WAN since I WFH and the failover is 5G, so if I experience jitter I can take a quick glance and see if it's my home connection or work's VPN.
The href provides click-through URL to launch the admin page for pihole while the ping is my LAN IP so I can see up/down status and latency. The url is my Tailnet IP, since I'm using serve on the magicdns url for the admin portal, the IP is needed for the api url to work.
Following the secrets guideline, we need to name everything we want to pass through starting with HOMEPAGE_VAR_ and using the double brackets within the yaml to call the secret.
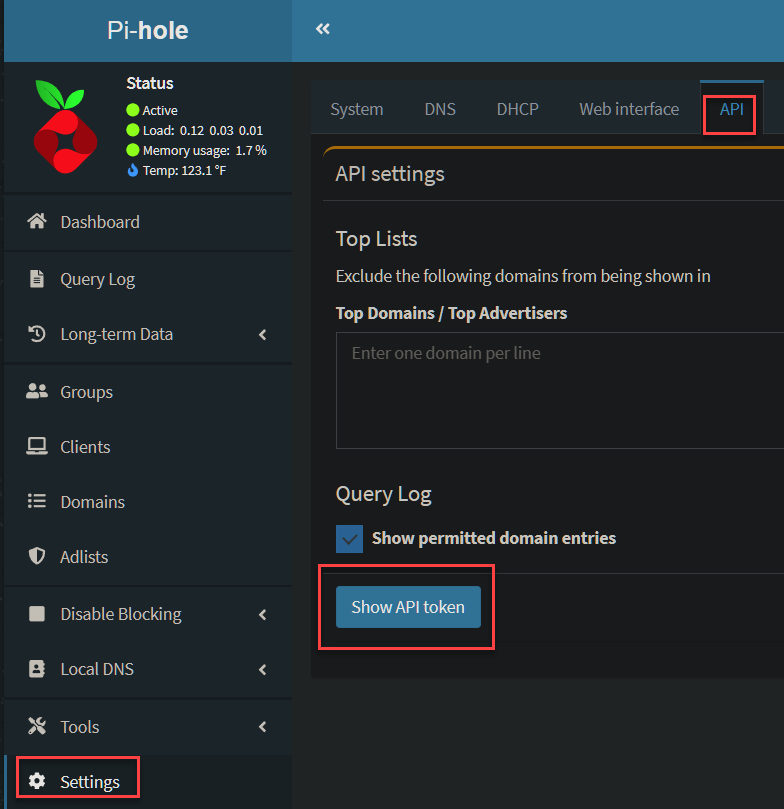
If you have a Pi-Hole you can get an API token here
This is what you modify in the Portainer's host .env and then you have to compose down/up Portainer, and re-deploy Homepage's stack to get the updated variable. Afterwards, we see the updated Homepage.
Nice, it's getting there, but still needs more work. Let's jump into widgets.yaml .
---
# For configuration options and examples, please see:
# https://gethomepage.dev/latest/configs/service-widgets
- datetime:
text_size: x1
format:
dateStyle: long
timeStyle: short
hourCycle: h23
# https://open-meteo.com/en/docs
- openmeteo:
latitude: <yourlatitude>
longitude: <yourlongitude>
timezone: America/Los_Angeles # optional
units: imperial # metric or imperial
cache: 5 # Time in minutes to cache API responses, to stay within limits
# https://github.com/nicolargo/glances
- glances:
url: http://100.1.1.1:61208
cpu: true
mem: true
cputemp: true
uptime: true
disk:
- /volume1
- /volume2
- /volume3
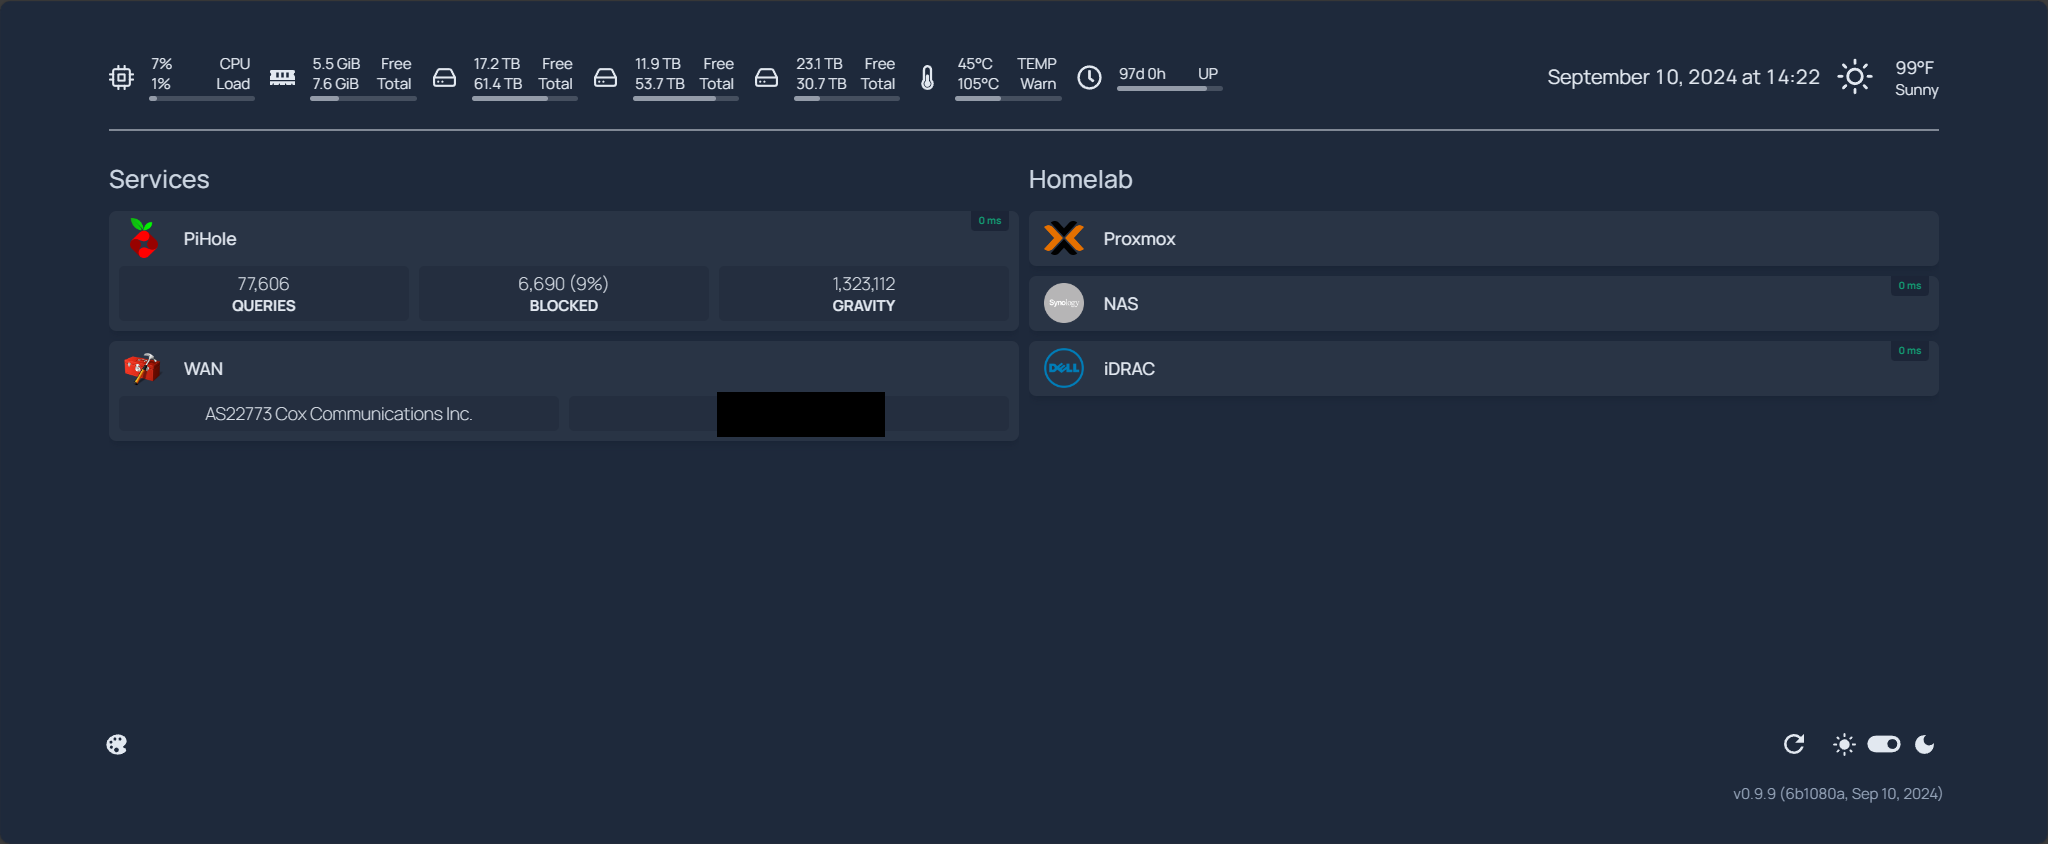
expanded: trueI'm getting rid of the hardware stats for the VM that's running this, because I have a better Grafana dashboard. I do like to keep an eye on my NAS though, so I installed Glances on my Synology and want to keep an eye on all three volumes.
I drop the search bar because I'm an adult who knows how to use a web browser. Made some changes to the date/time format and using OpenMeteo to get weather. Save the file and we get the following.
I'm going to delete everything in the bookmarks.yaml . Generally speaking I just keep a million tabs open and grouped by collection. If I need a tab from another device I use the browser profile to snag it. Plus if you configure the widgets and services yaml right all the stuff you self-host should be there.
Now I'm going to go to the docker.yaml and uncomment the socket, since we are exposing it directly in our compose. You can use docker-socket-proxy to expose it if you'd like, but for proof-of-concept I didn't.
---
# For configuration options and examples, please see:
# https://gethomepage.dev/latest/configs/docker/

# my-docker:
#   host: 127.0.0.1
#   port: 2375

my-docker:
  socket: /var/run/docker.sock
Now what this does is allow any docker containers to be discoverable by Homepage, and if you're passing through the proper labels it will add itself to your page.
Let's revisit the Portainer compose.yml you used and modify it a bit. Follow the steps to generate an API key and update your .env file with it. Then update your compose.yml to add the following in the portainer section.
labels:
- homepage.group=Services
- homepage.name=Portainer
- homepage.icon=portainer.png
- homepage.weight=3
- homepage.href=https://portainer.<magicdns>.ts.net/
- homepage.container=portainer
- homepage.widget.type=portainer
- homepage.widget.url=https://portainer.<magicdns>.ts.net/
- homepage.widget.env=2
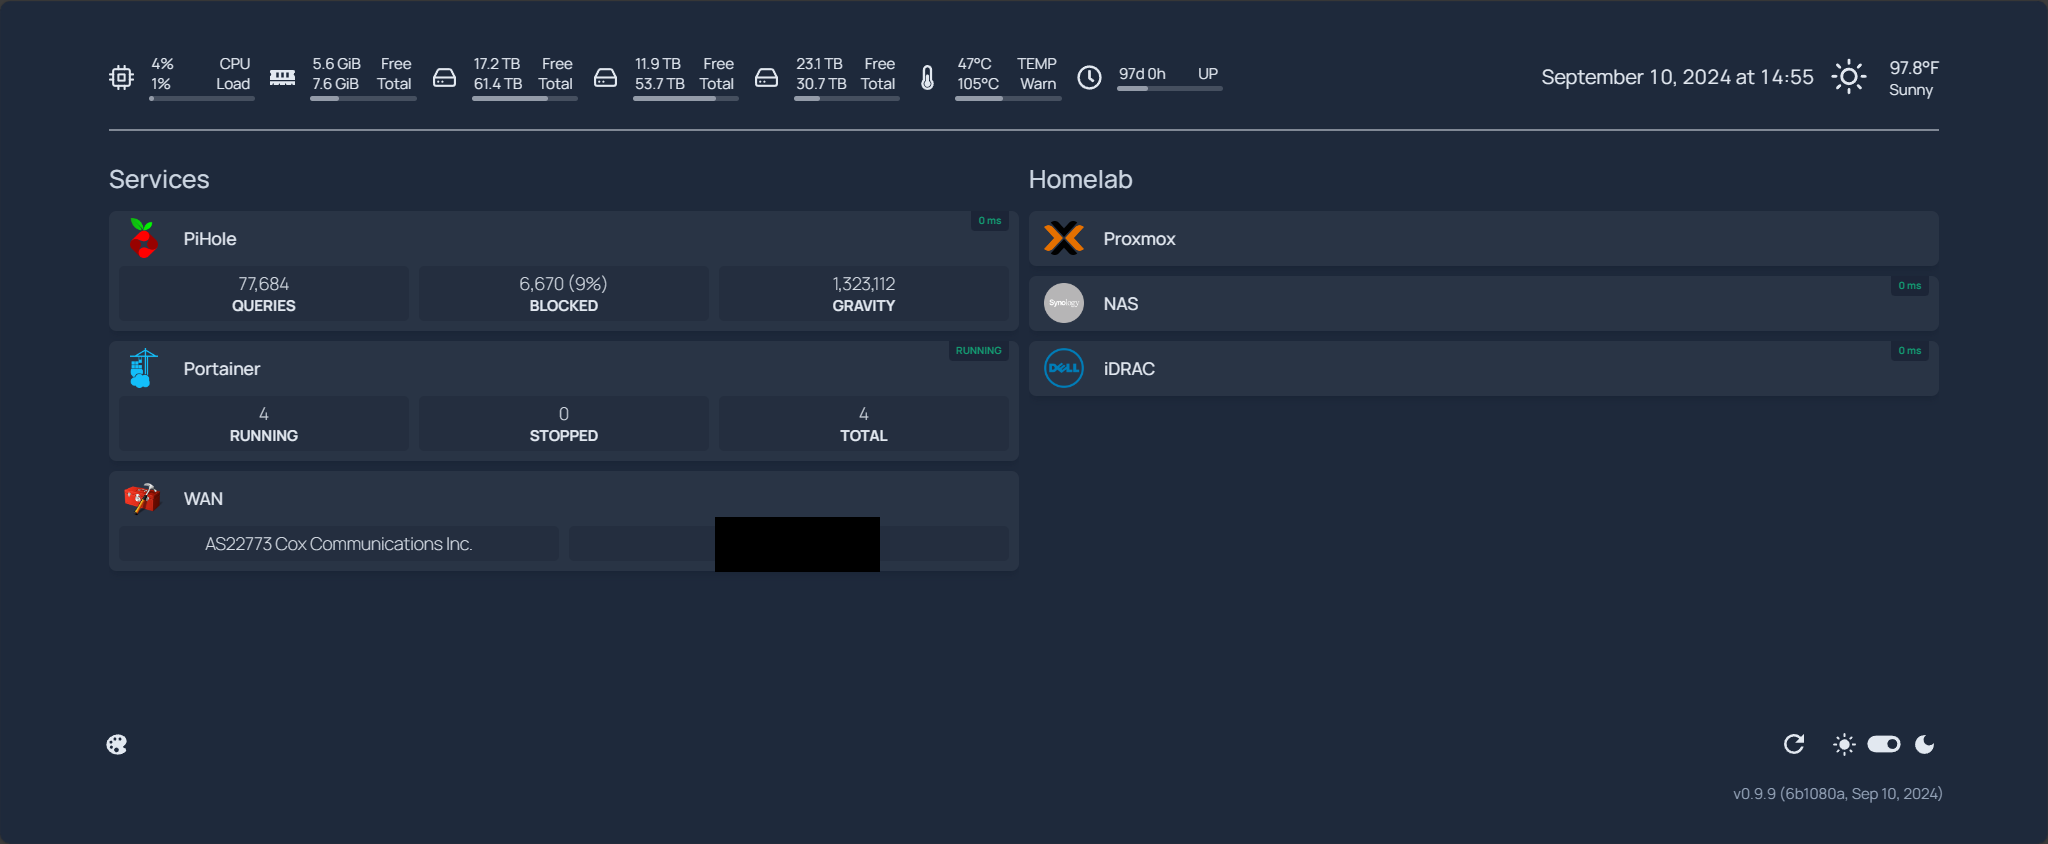
- homepage.widget.key=${HOMEPAGE_VAR_PORTAINER_API_KEY}If you compare with the services.yaml you'll see what most of this translates to 1:1. The addition widget bits are what's required from Homepage for the Portainer widget. Save both and docker compose down then docker compose up -d and let's go back to the Homepage.
Sweet! It added itself, useful for containers that you add, without having to dip into the Homepage files to modify. We're going to skip over kubernetes.yaml as I'm way too scared to touch k8s and we're just using docker.
Now for settings.yaml I modified it to the following.
---
# For configuration options and examples, please see:
# https://gethomepage.dev/latest/configs/settings
headerStyle: clean
layout:
- Services:
style: row
columns: 4
- Homelab:
style: row
columns: 5
hideVersion: true
background:
image: https://images.hdqwalls.com/wallpapers/son-goku-dragon-ball-super-dark-5k-zd.jpg
opacity: 35
#slate, gray, zinc, neutral, stone, amber, yellow, lime, green, emerald, teal, cyan, sky, blue, indigo, violet, purple, fuchsia, pink, rose, red, white
color: stone
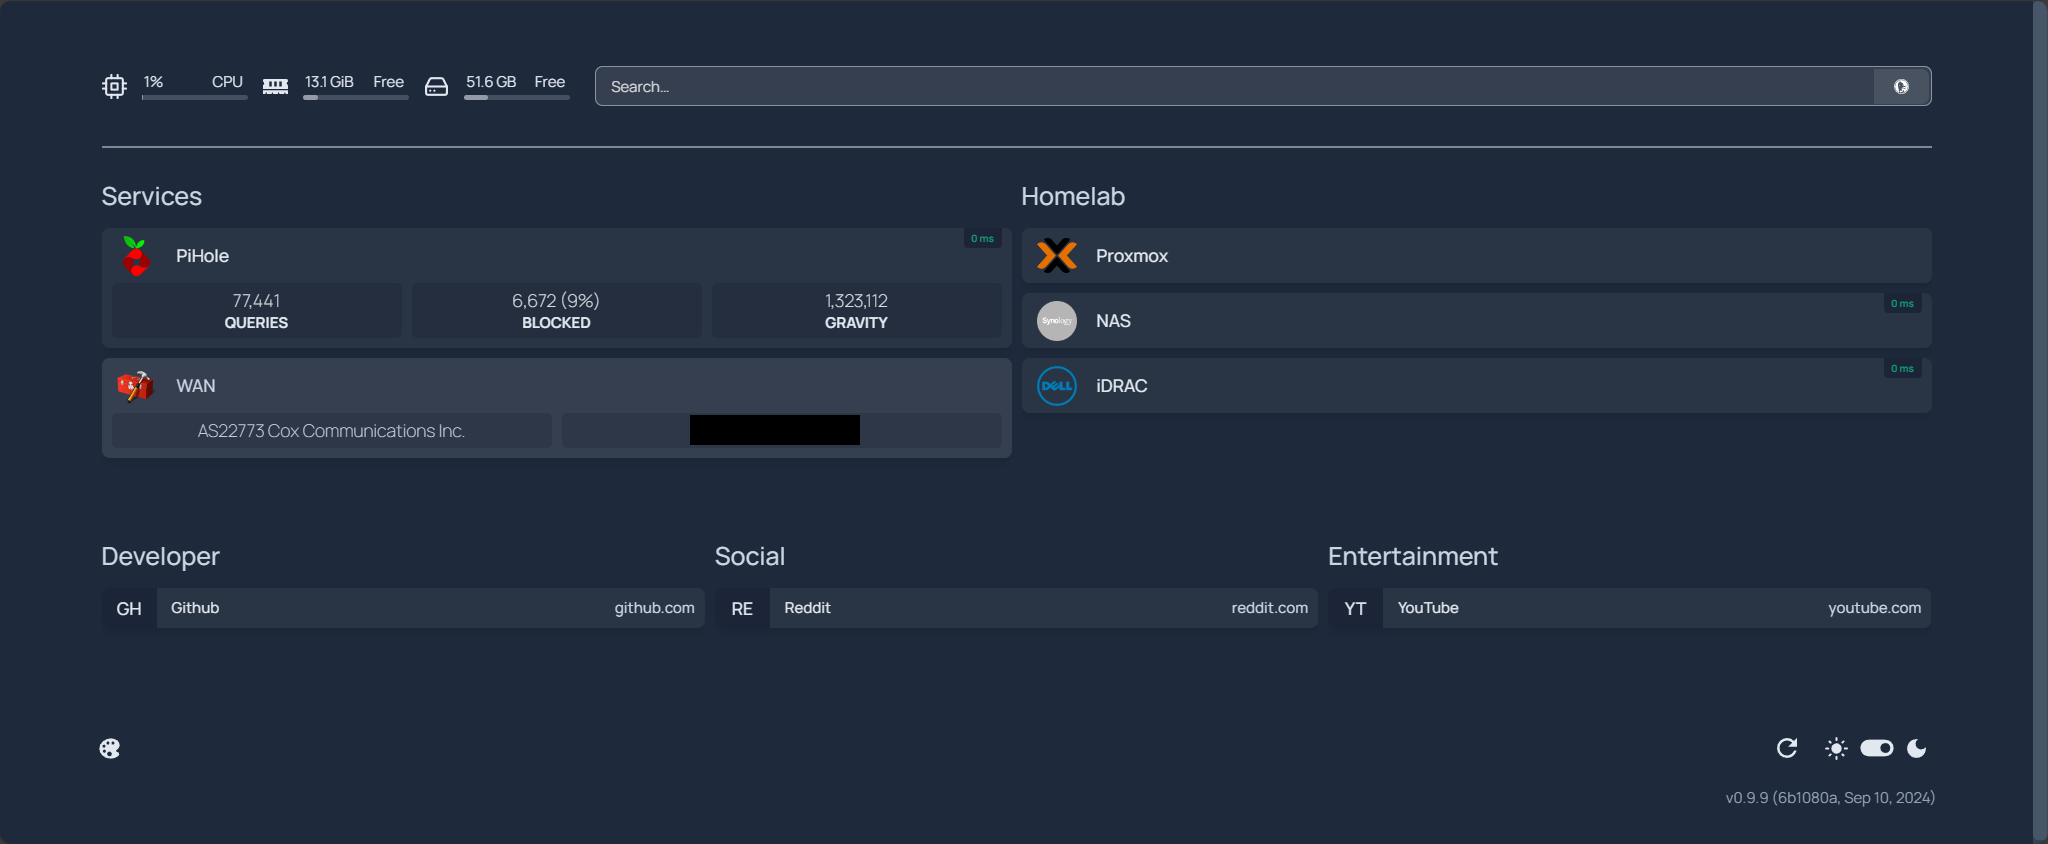
theme: dark # dark or lightI left some comments on some of the options, and chose a Goku background I found on the interwebs. Formatting the various Services and Homelab sections so they look better once you have more than 3 each.

There we have it! A Homepage accessible to any device on your tailnet, roaming or in house, with adaptive abilities to recognize new containers, and a way to adjust what services you want to have links for, including built-in health checks. Homepage is highly customizable, you can even add tabs within the page. I encourage you to explore the documentation.